Showing posts with label celluclay. Show all posts

Wednesday, October 4, 2023

DIY: Skull Planter!

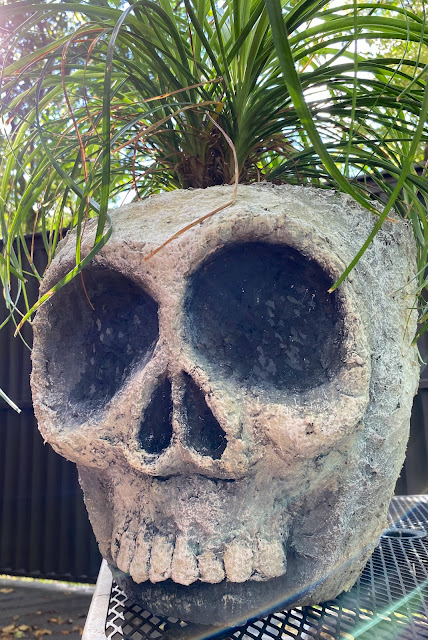
I spotted the coolest planter ever the other night at Cracker Barrel: it was a large plastic skull planter and I just had to have it!

Until I saw the $40 price tag.

Then I remembered how a while back I made TONS of Halloween decor with one of my long forgotten favorite art supplies: CELLUCLAY. You can check out all of those creations (well, most of them anyway), here. 

Here's the how-to video!

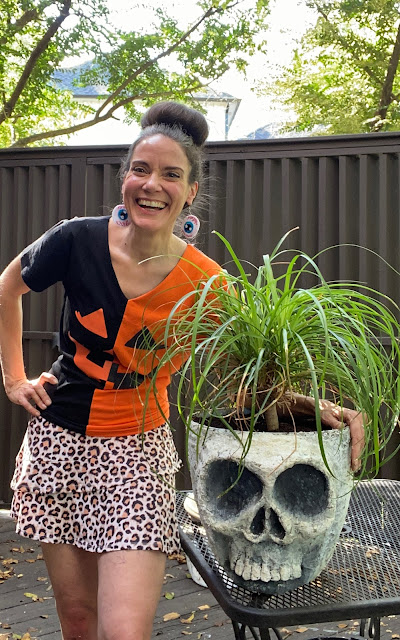
The process is super easy! All you need is Celluclay and a plastic planter...and acrylic paint. That's it! Oh...and maybe a cute little plant. This is one I scored at Walmart years ago on sale. It was so sad and almost dead that I named it Peanut. Peanut is now living it's best life in my brand new skull planter!
Part of the magic is in the painting when it comes to this kind of thing. I used a base coat of gray and then added a darker gray to the eye sockets and the nostrils to really deepen the look. Then I used diluted off white paint to go over that in the light areas. Finally I used a dry brush and white paint to add the highlights. 
I won't be leaving this outside. Celluclay, since it's waterbased, would probably not fair well outdoors. 

So in my over-crowded plant window, she will go!
Thanks for letting me share! I actually think I need to make more of these. Why, I have no idea! But it was just so fun and Halloween season is my absolute favorite!

photo signature_zpsd10b3273.png
Read more »

Tuesday, September 25, 2018

DIY: Top Favorite Fall Crafts

Fall is my very favorite. Halloween is my very favorite. If you've been around this blog for a couple of sessions then you know that it's this time of year that I'm usually firing up the hot glue gun, busting out the Celluclay and creating things that go bump in the night. This year...well, I'm just a little busy with other things to craft any spooky goodness. However, I do believe I'm pretty well stocked in all things frightening. So I thought I'd put them all together in one big ole blog post! All links will take you back to the original post which, more than likely, will have a how-to video. Happy Crafting!
1. Probably one of my all time favorite fall creations were these Zombie Head Planters. This was at the height of Walking Dead/Zombie popularity (remember when EVERY movie was a zombie movie?! Not that I'm complaining but, really, how many zombies movies do we need?!). I loved creating the expressions for these dead dudes!
2. These Halloween miniature pieces were fun to craft on an afternoon. The pumpkin dude was created from paper clay found at the craft store. And the little painting was a copy of a vintage Halloween creation. 
3. UGH, THIS PHOTO MAKES ME LOVE HALLOWEEN SO MUCH! I created these creepy heads with Styrofoam head forms found at Joann's, cheesecloth and liquid starch. That creepy mummy just might be my favorite.
4. The things you can do with that liquid starch and cheesecloth combo, y'all! This was a vintage music box thingie that I transformed into Frank and his Bride. Can I get a gig where I just sit around and make Halloween stuff 24/7? BECAUSE THAT WOULD BE AMAZING! 
5. When I found this old jewelry box at the thrift store, I KNEW I had to make it into a book of spells. Weird? Probably! But I'm telling you, Celluclay is magical and you can make just about anything with it!
6. On that same thrifting trip, I found a bunch of bottles and decided to craft potion bottles from them!
7. I've got my eye on you. All of 'em! How-to video included in this creep-tastic EYE POPPING blog post...sorry, I had to. 
8. What I really love most about creating is taking something boring and transforming it into something insane. This was a little "Country Store" bird house type thing...that I completely spook-i-fied. I love the little light at the top! Details here. 
9. Wow, you're such a chatterbox! Did I mention that I love creating with Celluclay? Okay, lemme tell you what it is: it's basically a paper pulp type of clay. It comes in dry form and all you do is add water. I love to add it to an armature, whether it be one I made or one I've thrifted. Once the creation is dry, I usually paint them all black and dry brush the color on top...I love the antiqued look it gives. Details on these guys can be found here. 
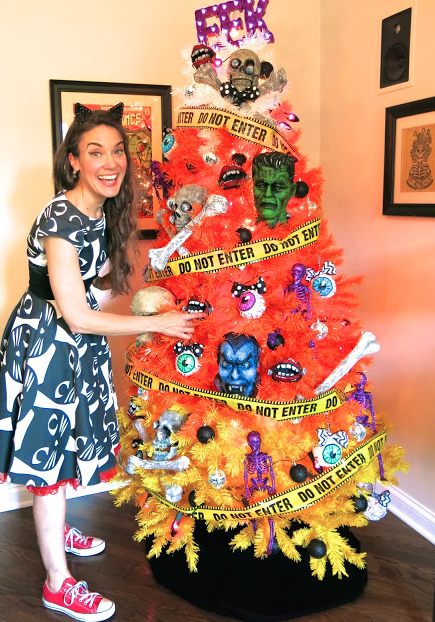
10. Yes, in case you are wondering, that IS a candy corn tree. More deets on that in a second. First, can we talk about that eye-popping dude? Loved creating those creepy skulls!
11. Gangster Bats! Beware...they'll give you an offer you can't refuse. 
12. The Halloween creation that started it all...these guys! I made them back in 2015 and they are still my most favorite thing! LOOK at those faces, so silly and happy. Details here.
13. The Bride has ALWAYS been my favorite...mostly because I find the actress, Elsa Lancaster, so striking! This was so much fun to paint...I need to paint more, I miss it. Mixing all those different tones tho? NOT my favorite!
14. Is it even fall without Day of the Dead creations?! I think not...they speak to my love of color on these cloudy days filled with crunchy brown leaves. These planters were so fun to paint!
15. We travel a lot during the fall...mostly to our haunted house events. I love to have a craft on hand to work on and embroidery is usually my go-to. This reversible necklace was created during one of our Halloween adventures.
16. Hosting craft nights is one of my favorite things...something I don't make the time to do right now...but hope to in the near future! My artsy friends and I created these guys on a craft night a couple years ago and they are still my favorite. 
17. Decorating a candy corn tree counts as a fall craft, right?! This tree is from Treetopia and it's just about the best thing ever. I have a rainbow version in my art room!
18. I've never officially blogged about my Hitchhiking Ghosts painting inspired by Disney's The Haunted Mansion because I felt like I never finished it! But I kinda don't mind it in it's ghastly ghostly state...and I'm pretty sure I'm just too lazy to finish it.

And there you have it! My Top 18 Fave Fall Crafts! I'll be continuing this lil series with my fave fall art projects for kids and, of course, my fave fall ensembles. Yay! It's fall, y'all! 
 photo signature_zpsd10b3273.png
Read more »

Saturday, April 28, 2018

In the Art Room: Paint Tube Sculptures

 So, a while back I shared with y'all that my students were sculpting art supplies. My first graders made pencils, some of my fourth graders made glue bottles, my third graders made crayons, and my second graders made glue sticks and scissors (which I've not blogged about yet! Stay tuned!). Two of my fourth grade classes made tubes of paint. We JUUUUUUST finished them off this week as I totally forgot about them in the middle of us working with clay, sewing our pizza pillows and end-of-the-year/art show madness. So, without further ado, here they are! 
 For this lesson, we used toilet paper tubes as our armature. We wrapped them with Activa's Rigid Wrap and created the paint with Celluclay. Here's the video tutorial I created:
Instead of having the kids paint the words on the tube, which proved to be a touch difficult for me, they came up with their own names and wrote them on a white label. That was then attached to a black strip of paper which I hot glued to their tubes. 
 Once the tubes were created, we did the 100 Color Challenge to come up with our own unique color for our tube. The challenge was apart of my evaluation. You can check out more of that here:
Once the kids had come up with their color, they added that and their own concoction of gray to the tube. 
 Dreaming up the color names was probably the best part!
 With our art show just two weeks away, I'm excited to see all of our art supply sculptures on display. 
 If we'd had the time, I would have loved for these guys to create palettes and paint brush sculptures too...but the school year just isn't long enough for all the fun!
 For our art show, we're going to have quite the mix of 3D displays: art supplies, super heroes and pizzas! I've tried to think of a way to have them all make sense together...but they just don't and that's okay. 
 I also coulda spent an entire year having the kids sculpt art supplies, it was so fun! 
 I cannot wait to share with you how are art show is progressing. I'm sorry I've been spotty here...it's just the busiest time of the year! You know what that's like, right? 
 To seal these projects, they were covered in Extreme Glitter ModPodge...yes, that's a thing. For the bottom, ModPodge was added and then sprinkled with silver fine glitter.
 The kids and I are thrilled with how they turned out! 
 I'm down to just a few more days of art classes with this fourth grade bunch...which makes me sad. I've taught them since kindergarten...I hope they have as fond of memories of me as I have of them! 
 Thanks for letting me share this project with y'all...if you've given it a shot, I'd love to hear about it!


Read more »

Tuesday, October 31, 2017

Happy Halloween! Celluclay Haunted House

So, just a side note: I'm SUPER DUPER annoyed today. The last half dozen videos I've shared on my YouTube channel, including the one below, have been flagged as "inappropriate". I'm talking my teaching videos, my art room decor videos, everything. As soon as I post ANYTHING, it's getting flagged and removed from view. I feel MISERABLE about this...and won't be sharing any videos until this gets resolved. It's a waste of my time to post something simply to have it removed. It's obvious it is someone who is a subscriber and just simply removing my videos to be a butthead. Guess what? You've succeeded at being an EPIC butthead. Congratu-butthead-lations. 

On to my completely inappropriate video! Brace yourselves, it totally deserves to be blocked (ha!): 
Having found this little cottage at the thrift, I immediately knew I wanted to haunted house-ify it. The beauty of Celluclay is that you can transform just about anything super easily. I've actually got a slight collection of randoms that I've been gathering from the thrift to transform. For that reason, I'm no longer permitting myself to go into the thrift store for a bit #hoardermuch.
 In the video, you'll see that the house began as simple as a wooden box. Not much of a haunt. I decoded to spook-ify it by adding turrets, a porch, columns and windows a plenty.
 Having Celluclay'ed the daylights outta the thing, I did have to dry it in front of a fan for a day. Even still, I did notice that the areas which didn't dry completely started to mold. No bueno. But when I painted over the entire surface with black acrylic, that seems to solve the mold problem.
 Dry brush is my fave way to paint. I love the antiqued look it adds to my creations. 
 Just a view from the side...and the back. I really wanted to find one of those flickering light bulbs but, alas, I could not. So a wee bulb with some red paint applied would have to do.
I really wanted to add wee lines for the wooden boards on the house, shingles to the roof and that sort of thing...but since Halloween is TODAY and I was painting this LAST NIGHT, I just ran outta time. Next year! Maybe. Okay, probably not, who am I even kidding.
 Y'all don't even know how sad I am that I have to take all of this fun stuff down. My only comfort is that I get to replace it with CHRISTMAS!
 Have a happy and safe Halloween, friends!


 photo signature_zpsd10b3273.png
Read more »